This comprehensive guide provides step-by-step instructions for configuring the Diamond VC500 and VC500SE video capture devices with OBS Studio . For a visual walkthrough, follow our YouTube Video Tutorial here . Timestamps in this guide correspond directly to the video; click them to jump to that section.
VIDEO
1. Hardware Requirements (0:03)
Before starting, ensure you have the following hardware ready:
Computer: Windows PC or Mac.Capture Device: Diamond VC500 or VC500SECables: Composite (RCA) cables (Yellow, Red, White).Source: A VHS player (VCR) or camcorder with composite outputs.
Connecting the Hardware (0:18)
Connect the composite cables to the outputs on your VHS player.
Connect the other end of the cables to the corresponding colors on the VC500 adapter.
Plug the VC500 USB connector directly into a USB port on your computer.
2. Software Installation (0:34)
Visit obsproject.com and download the version compatible with your operating system.
Run the installer and launch OBS Studio .
When the “Auto-Configuration Wizard” appears, click Cancel to configure manually for the best quality (1:14)
3. Configuring Video Sources (1:30)
In the Scenes box, ensure at least one scene is created.
In the Sources box, click the + icon and select Video Capture Device .
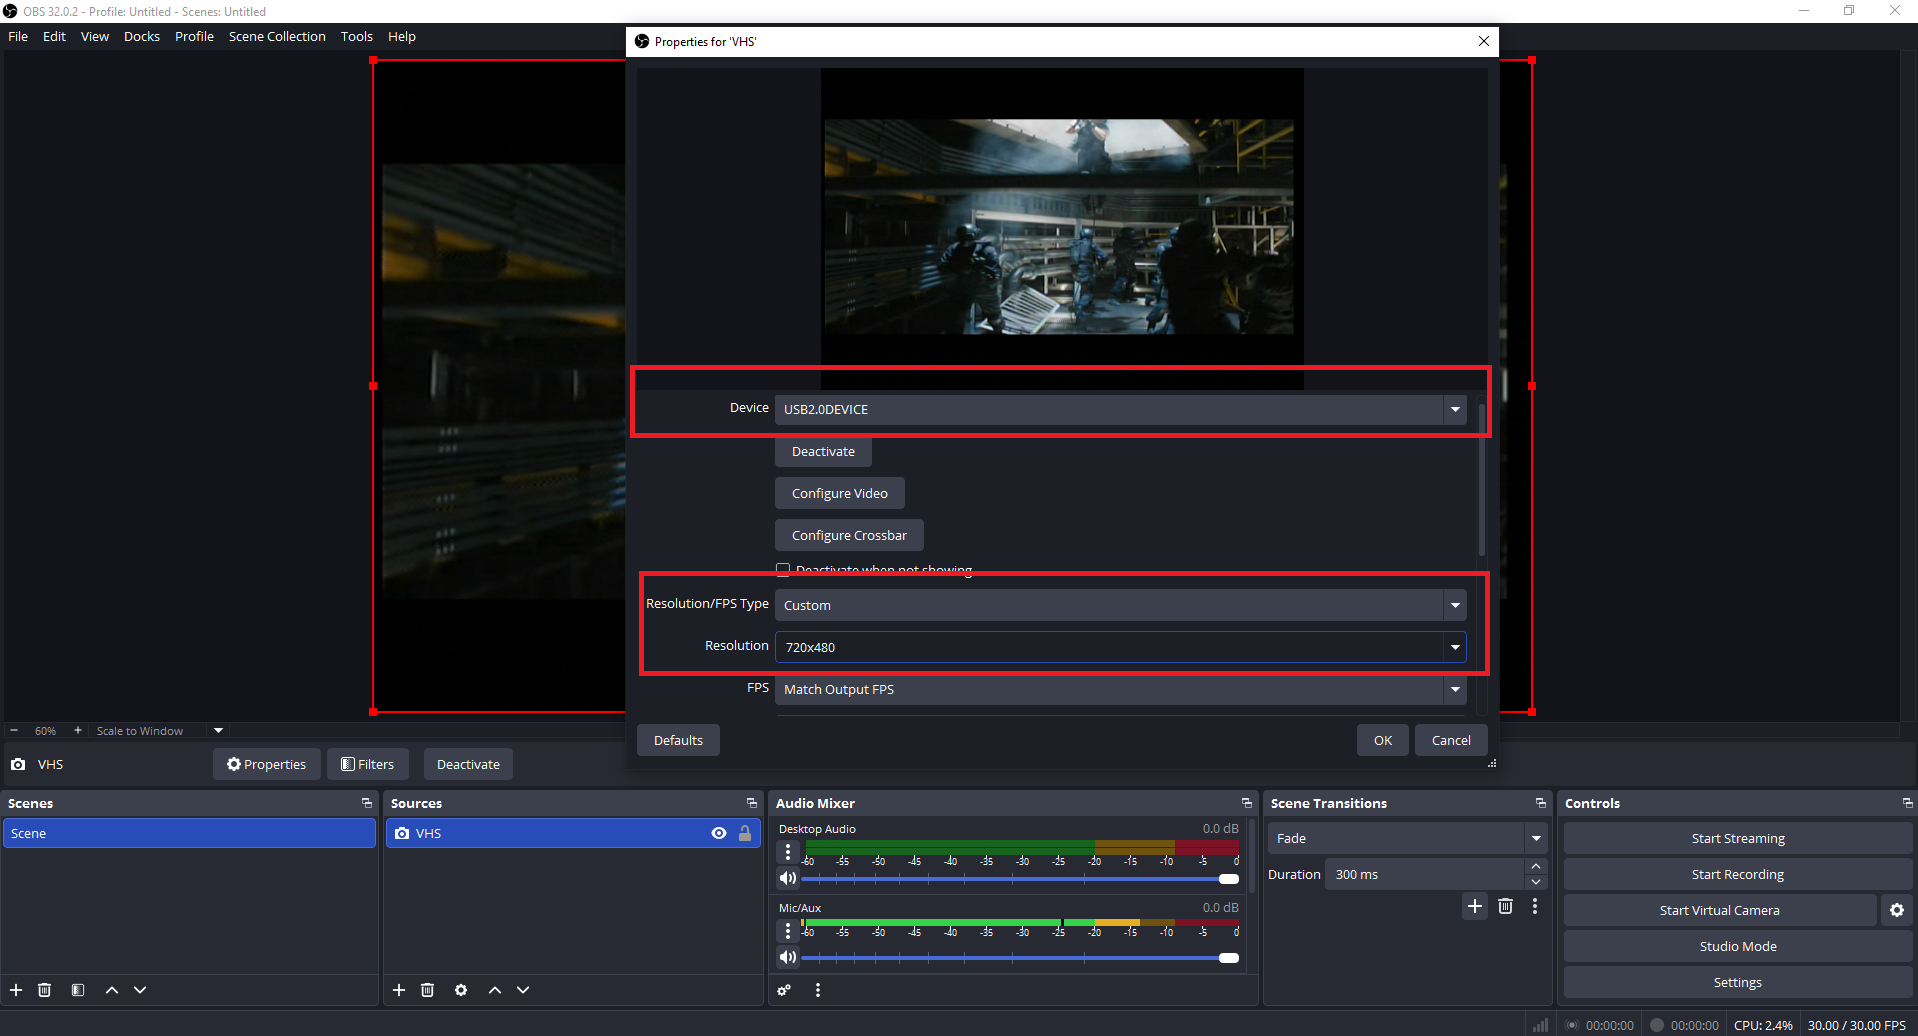
Name it “VHS” and select USB 2.0 DEVICE from the Device dropdown (1:44)
Change “Resolution/FPS Type” to Custom .
Set the Resolution to 720×480 and FPS to 30 (1:50)
Go to Settings > Video and ensure both the Base (Canvas) and Output (Scaled) resolutions are set to 720×480 (2:01)
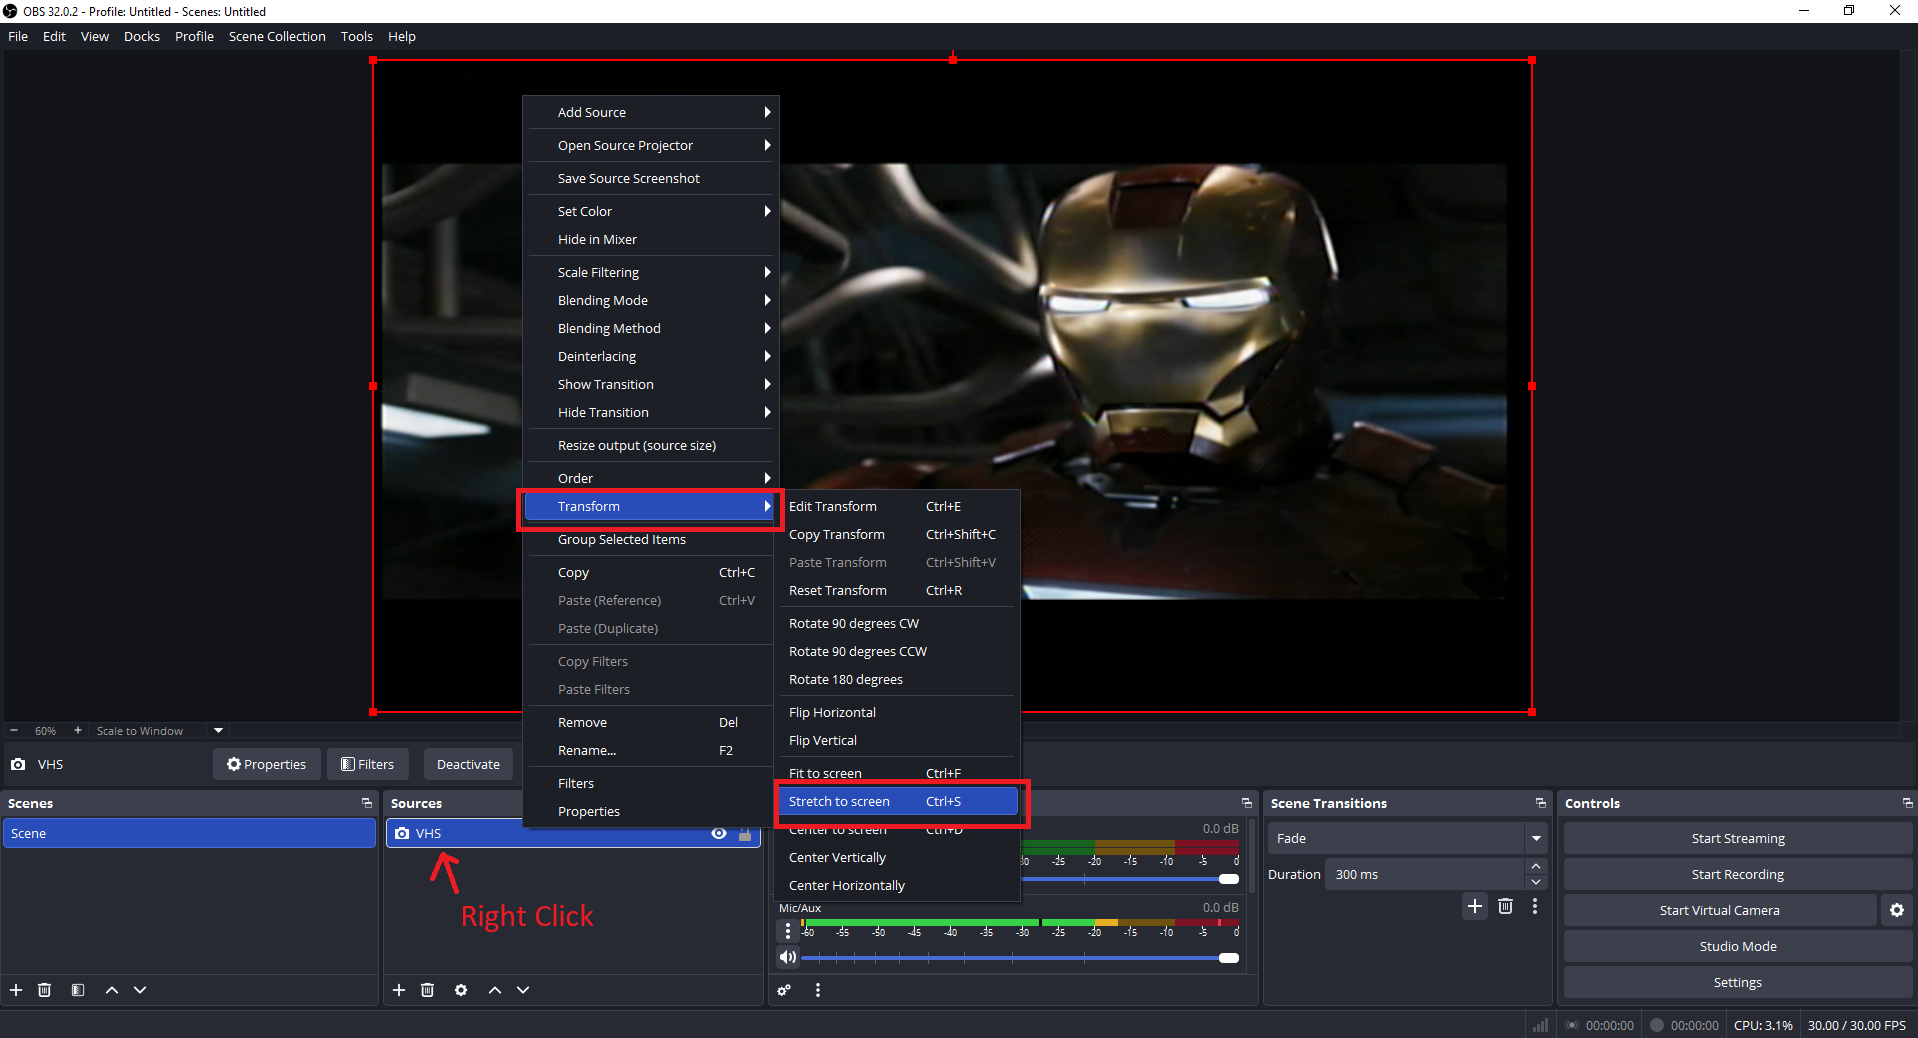
Scale to Screen: If your video has black bars, right-click the “VHS” source in the preview window, select Transform , and click Stretch to screen.
4. Configuring Audio Sources (2:28)
Go to Settings > Audio .
Set Mic/Auxiliary Audio 2 to Microphone (USB 2.0 Mic) (2:48)
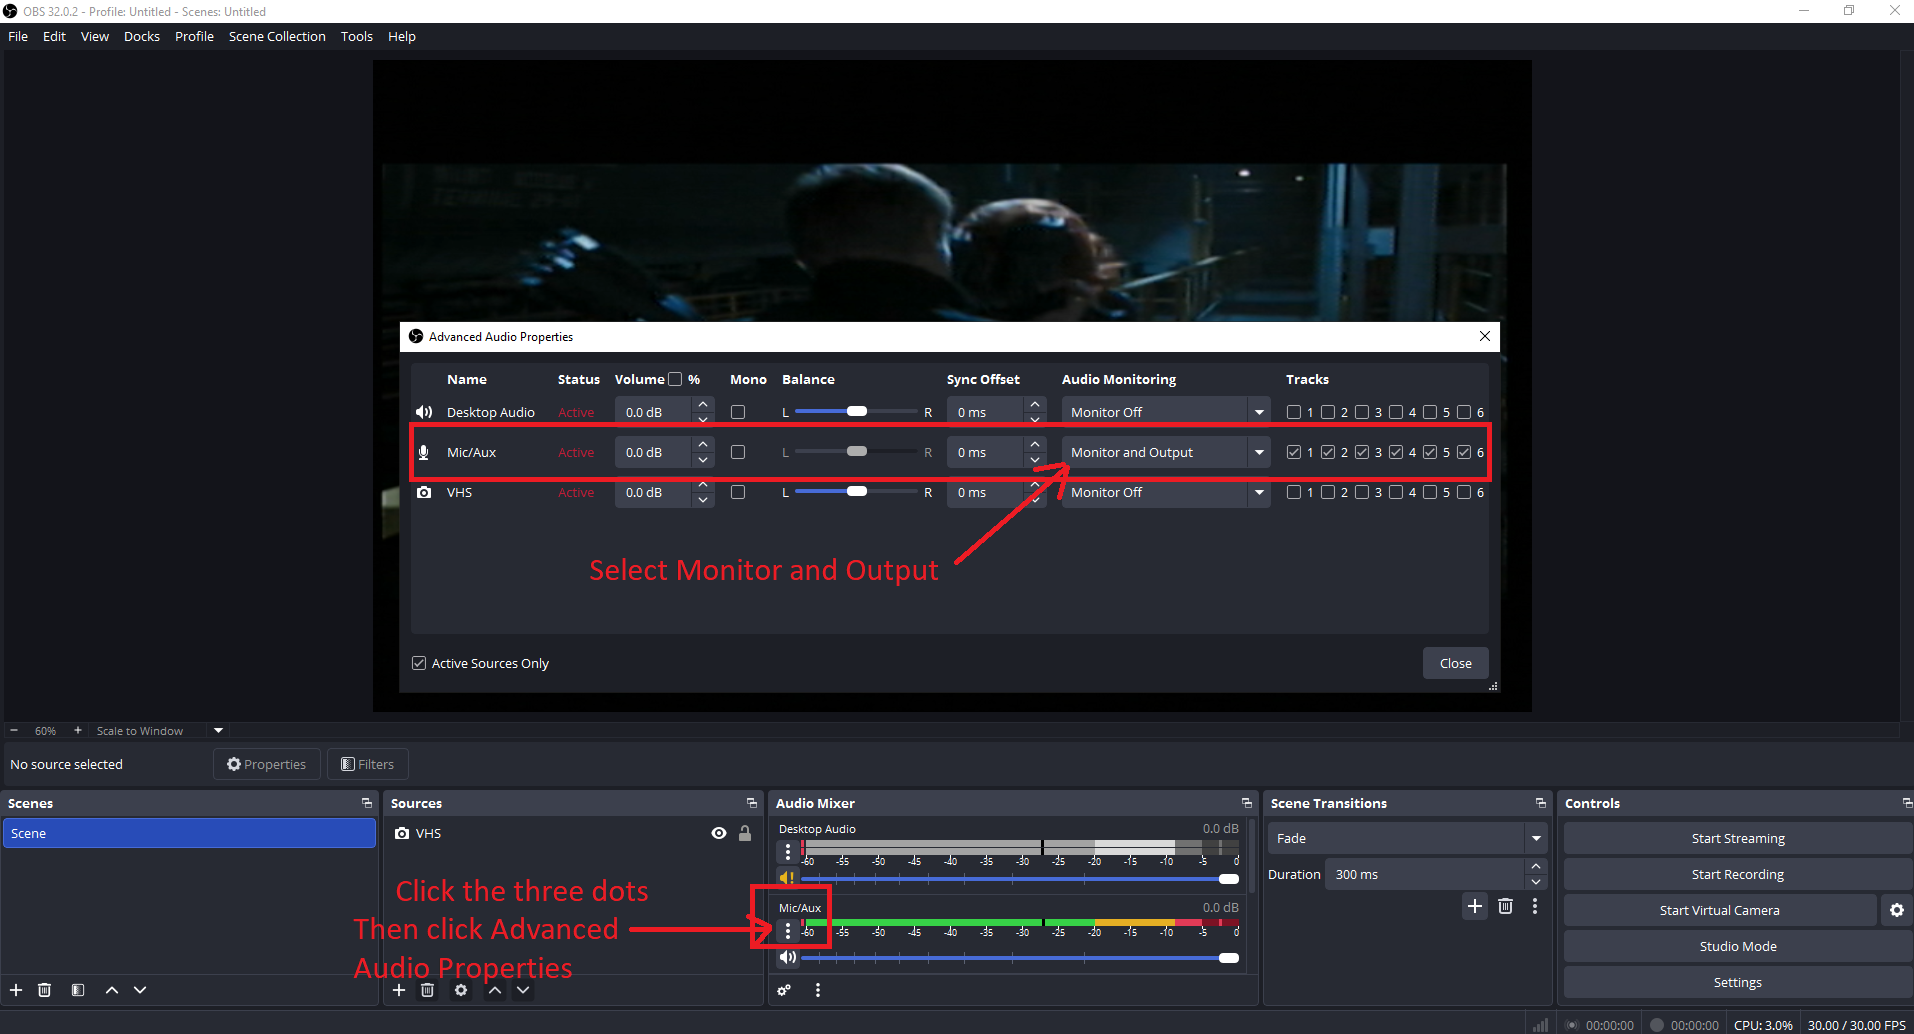
In the Audio Mixer, click the three dots next to your source and select Advanced Audio Properties (3:09)
Set “Audio Monitoring” to Monitor and Output to hear audio while recording (3:32)
5. Recording Settings (3:38)
Go to Settings > Output and change “Output Mode” to Advanced .
Under the Recording tab, choose your Recording Path and set format to MP4 (3:51)
6. Capturing Your Video (4:36)
Click Start Recording in OBS Studio.
Press Play on your VHS player.
When finished, press Stop on the VHS player and Stop Recording in OBS (4:52)
Troubleshooting & Pro Tips
Black Screen (Windows): Check Privacy & Security > Camera settings to ensure OBS has access (5:42) Black Screen (Mac): Check System Settings > Privacy & Security for Camera and Accessibility permissions (6:12) Audio Out of Sync: In Advanced Audio Properties, adjust the Sync Offset (start with 100ms) (6:35)