
How to convert VHS to Digital Files on the Macbook and Macbook Air using the Diamond (VC500)
With the Diamond USB VHS to Digital File converter model VC500 converting your precious memories to digital files is as simple as ever.
No Driver, No software to install, just plug and play
Use the included Mac OS iMovie, create professional‑looking videos without an editing degree. Easily add photos and videos to projects, trim clips with your finger, add seamless transitions, and fade audio like a pro.
Burn full-screen video capture, edit and create DVD and VCD. Upload your finished videos to YouTube and other popular video sites or just share them with friends and family.
Step 1:
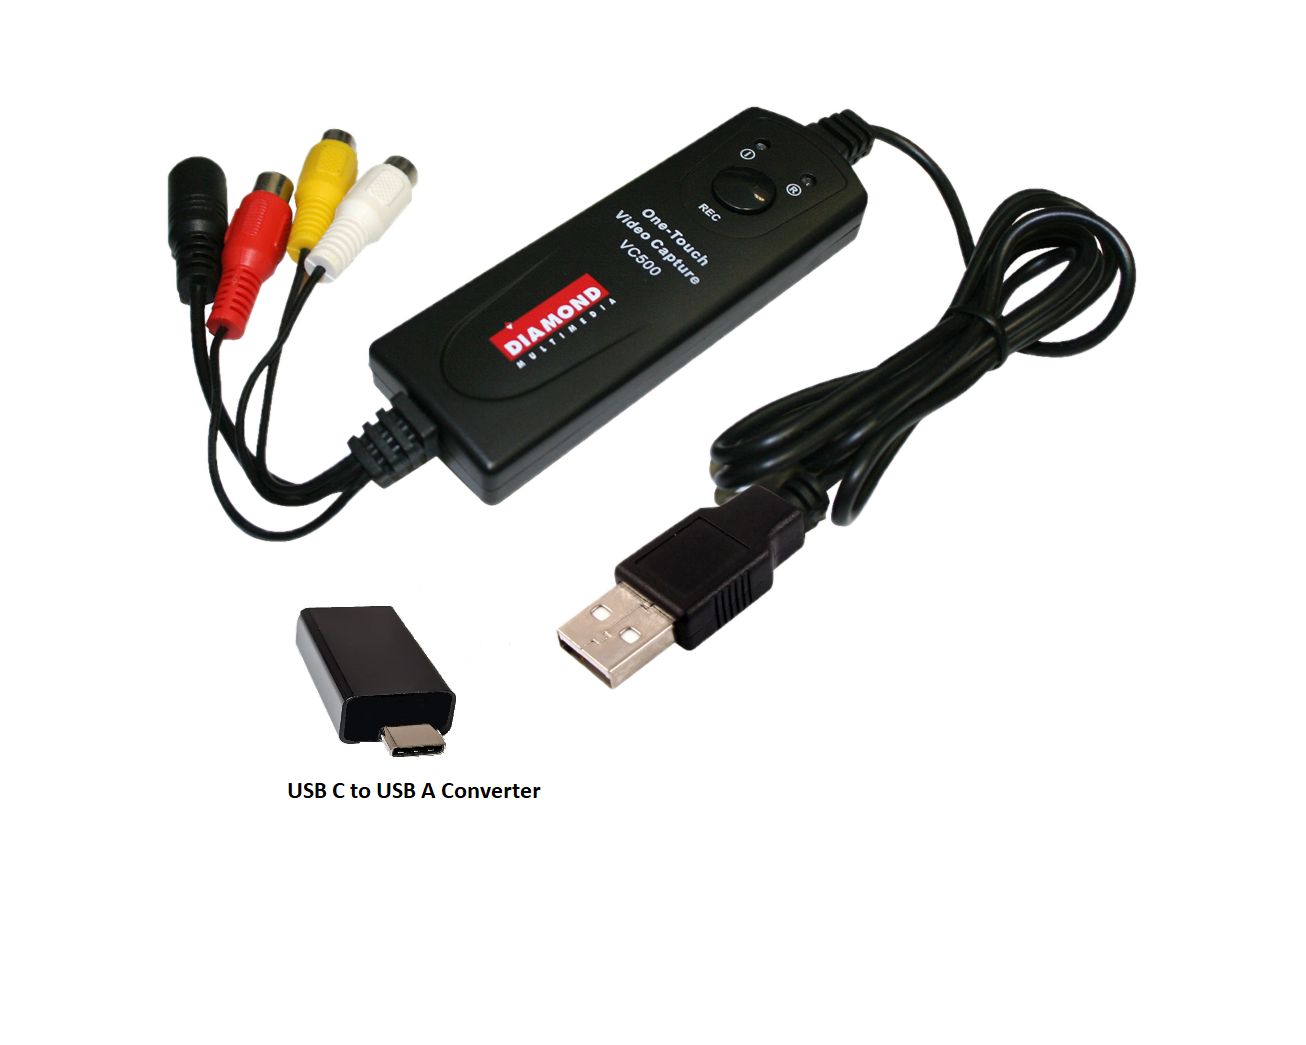
Plug the VC500 USB connector into the USB port on your Mac. Note: A USB 3.0 to USB Type-C adapter is included for those models that only support USB Type-C
Open Quick Time Player (Quick Time Player is an application included with Mac OS. You will find it under Applications

Step 2:
Select “File” from the Menu

Step 3:
Select “New Movie Recording”

Step 4:
Click on the drop down arrow next to the record button

Step 5:
Select USB2.0DEVICE for both Camera and Microphone
NOTE: If you have not connected your Source to the VC500, now is the time to do it.
Connect the included red, white, and yellow AV cable from the output of your VHS or any other composite source you are using and then connect the other end to the matching inputs on the VC500
Step 6: Recording using Quick Time Player
When you are ready to record click the “Record” button in the Quick Time Player to start recording and then again to stop the recording
Step 7: Saving your video using Quick Time Player
After you finished recording select “File” from the Quick Time menu, then select Save and give your file a name and a location where you want to save it.
Congratulations you have just converted a VHS video to digital format!!